This year for Christmas, Brad and I upgraded to a king sized bed. Which really is a gift to me of better sleep. As our previous queen sized bed was divided thusly: he had half, my half was then shared among myself and the two pups (who oddly never place a paw onto his side of the bed). Every night, Phoebe would curl up around my stomach and Presley would lay on my shins. Lately, he's been migrating to the top of the bed and sleeping on top of Phoebe, but that's neither here nor there.
But, being who we are, we had very specific ideas about what we wanted for our bed. And it was just easier to build it. I mentioned how we built the base a while back, but we just got around to the headboard this week.
And because I like to pretend people take my blog posts as a how to, here are entirely too many photos of our progress!
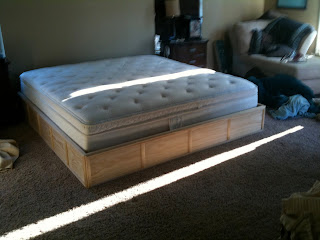
This pile of wood became the base for our bed:
We used three pieces of 1x12 white pine for the majority of the base. and several 1x8 boards in the center to support the weight. Then placed two pieces of plywood over that to hold the mattress.
We wanted the mattress to sit down into the edge of the bed (Mostly to make the bed lower so Phoebe could jump up).
Then we added some detail trim. Around the top, bottom and sides, we added a trip called 'stop,' and in between, we added 'mullion' to make a box shape. The mullion curves downward on both sides, but the stop only curves down on one.
Then we stained it with "American Walnut," we did not use a wood conditioner. (We definitely should have!) So we had to add several layers of stain and it's so dark that it pretty much looks like paint.
You live, you learn.
It took us one day to build it and another day to stain it. We use a water based stain because it dries faster than the oil based.
We debated over the headboard. I wasn't anticipating working on it this weekend since my sister was visiting, so I didn't have 'The Plan" ready. But we figured it out. Of course, after finishing, we already know how we would have done it differently.
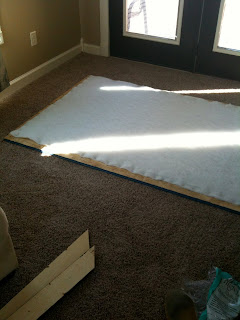
This board is four feet tall and the width of the bed (78 inches). We stapled four layers of batting down, leaving about 2 inches of bare board exposed all the way around.
We then took this fabric:
And wrapped it around the board.
The frame was then nailed on in pieces. This is where we would have done it differently. I would have pieced the frame together using "L" brackets and then put the entire frame over the board as one piece. We instead put each side on individually. It didn't exactly work right. Not terrible, just not the caliber of work we usually create.
Then, we took a cleat and placed it on the back of the headboard.
And placed the other side of the cleat on the wall (we secured a 1x4 to the studs first, and placed another 1x4 lower to balance the headboard).
And hung it!
The space will allow us to hang rope lighting behind the headboard and, well, just look cool.
I just had to include a picture of the happy pup, playing with his new moose. He hasn't killed it yet. I give him a day.


Amazing! I am so jealous that you can build that! I am totally going to show my husband. HINT to him!
ReplyDeleteLooks great! I may be getting more details from you at some point regarding how you hung the headboard. PS- Love that you consider Phoebe in your bed height! Bruiser has a little ottoman at the end of our bed to help him up there!
ReplyDeleteWOW. That takes some serious talent. What a gorgeous headboard!
ReplyDeleteWow..that looks great! I love the colors you're using, my husband and I recently redecorated our room and we used the teal blue and chocolate brown.
ReplyDelete