
We've talked about putting a pergola on our back deck for a while. Partially because we now realize an uncovered deck is stupid in the Arkansas heat and because an uncovered back door lets water in.
That and well, pergolas are just pretty!

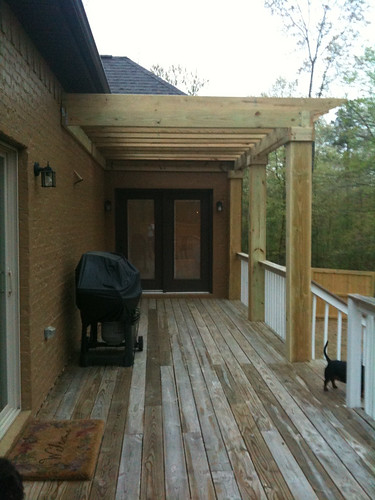
So, here is our deck after we stained all the railing white. The rest of the boards were supposed to be stained a dark brown (to go with out trim) a while ago, but the unusually wet year last year forced us to put that project on hold. And really, since then it's been our own laziness that's put it off further.

Two weekends ago, we started building the pergola. Of course, Brad and I had completely different ideas about what was the BEST way to put it up.
I want to go ahead and point out that we did it my way and, as usual, I was right and it rocked!
Of course, it didn't start out well, as most projects that we don't really know what we're doing have a tendency to do.
See these ledger boards? That took us an entire day.
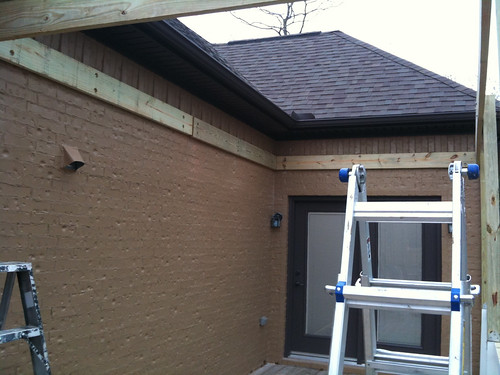
Let me repeat, AN ENTIRE DAY!
We bought a hammer drill, which, if you don't have one, well, it's probably because you don't need one. But, they're pretty cool. But useless unless you need to drill into concrete/brick/mortar. Which, we did.
For the record, it is best (despite the OVERWHELMING weight of those terrible boards) to 'hold them up in place' and mark where the mortar joints are FIRST. And THEN drill your holes in the boards. And THEN hold the board up and drill through those holes into the mortar.If you try to drill through the brick you will get into a big fight because someone almost drops the heavy board because she has tiny arms and can't support the weight of a 50 lb board so she gets the bright idea of propping it up with another board, thinking that will help, and it does, but doesn't hold the board HIGH enough, therefore putting the wholes in the slightly wrong place and upsetting the hole-making person.
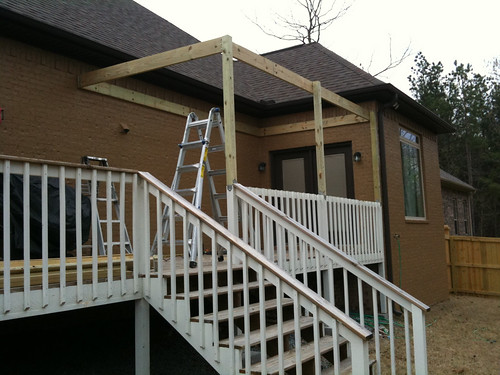
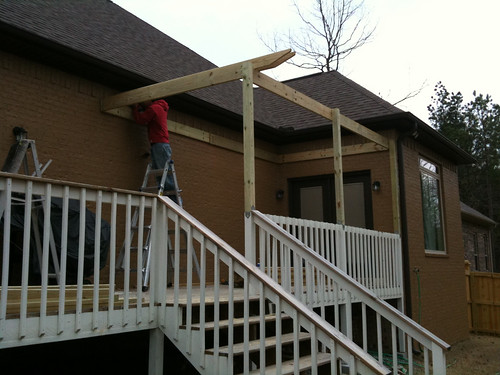
Anyway, we yanked off the top railing and extended the existing columns to support the outside ledger boards.
And then Brad freaked out and decided that if an inspector came by (you know, inspecting other houses being built they would 'get us' for not having a permit. So we were 'forced to finish.'
We cut the top boards at a sharp angle. I of course had wanted this really cute swoopy thing, but in the name of time, an angle would have to do.
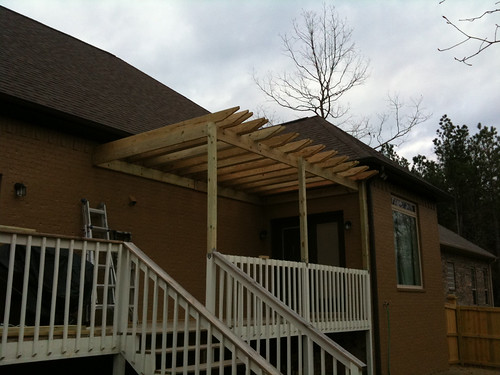
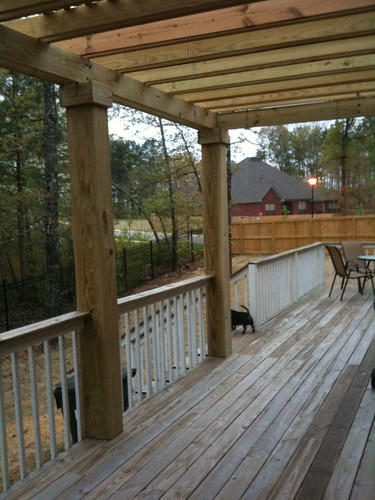
The next weekend, we built out the columns to be a bit larger. Both for support and for design.
All told, the project cost us about $500 (including the hammer drill $70). Once the wood has dried out, we will paint the columns white and all the top beams dark brown.
Of course, that's assuming we ever get around to it. :)
A-hem.
Anyway, we yanked off the top railing and extended the existing columns to support the outside ledger boards.
And then Brad freaked out and decided that if an inspector came by (you know, inspecting other houses being built they would 'get us' for not having a permit. So we were 'forced to finish.'
We cut the top boards at a sharp angle. I of course had wanted this really cute swoopy thing, but in the name of time, an angle would have to do.
The next weekend, we built out the columns to be a bit larger. Both for support and for design.
All told, the project cost us about $500 (including the hammer drill $70). Once the wood has dried out, we will paint the columns white and all the top beams dark brown.
Of course, that's assuming we ever get around to it. :)
I love it! Now? In Minnesota? No need for those. Cause it is always cold. Laziness has hindered far more projects than I'll admit at my home!
ReplyDeleteI love it, too! Last summer, my father-in-law came down to San Diego and offered to build us a patio cover. This is what I'd envisioned. It's....not what we got. But that's a story for another time.
ReplyDeleteHooray for successful house projects!
Looks great! I love that Phoebe's hiney even made it in a picture!! :-) Can't wait to hang out under your fabulous pergola!
ReplyDeleteAnd your house-iversary is our wedding anniversary. We should celebrate.
I like that. I want to cover our back deck, and hadn't thought of a pergola. We'll have to consider the idea. It looks lovely.
ReplyDelete